Updated August 2026
—
So, you suddenly have a handful of leftover ceramic tile on your hands from a recent home improvement project. What can you do with all this ceramic tile than pitch it immediately into the garbage?
You’ll be surprised to hear how versatile ceramic tile crafts and art projects are. These top 10 leftover ceramic tile ideas are so clever that even if you have no leftover tile, you might just want to run out to buy some! It’s time to upcycle tile in practical, fun, and even elegant ways.
[Related: Choosing the Best Ceramic Tile for Your Project]
1. Dry Erase Magnet Tiles
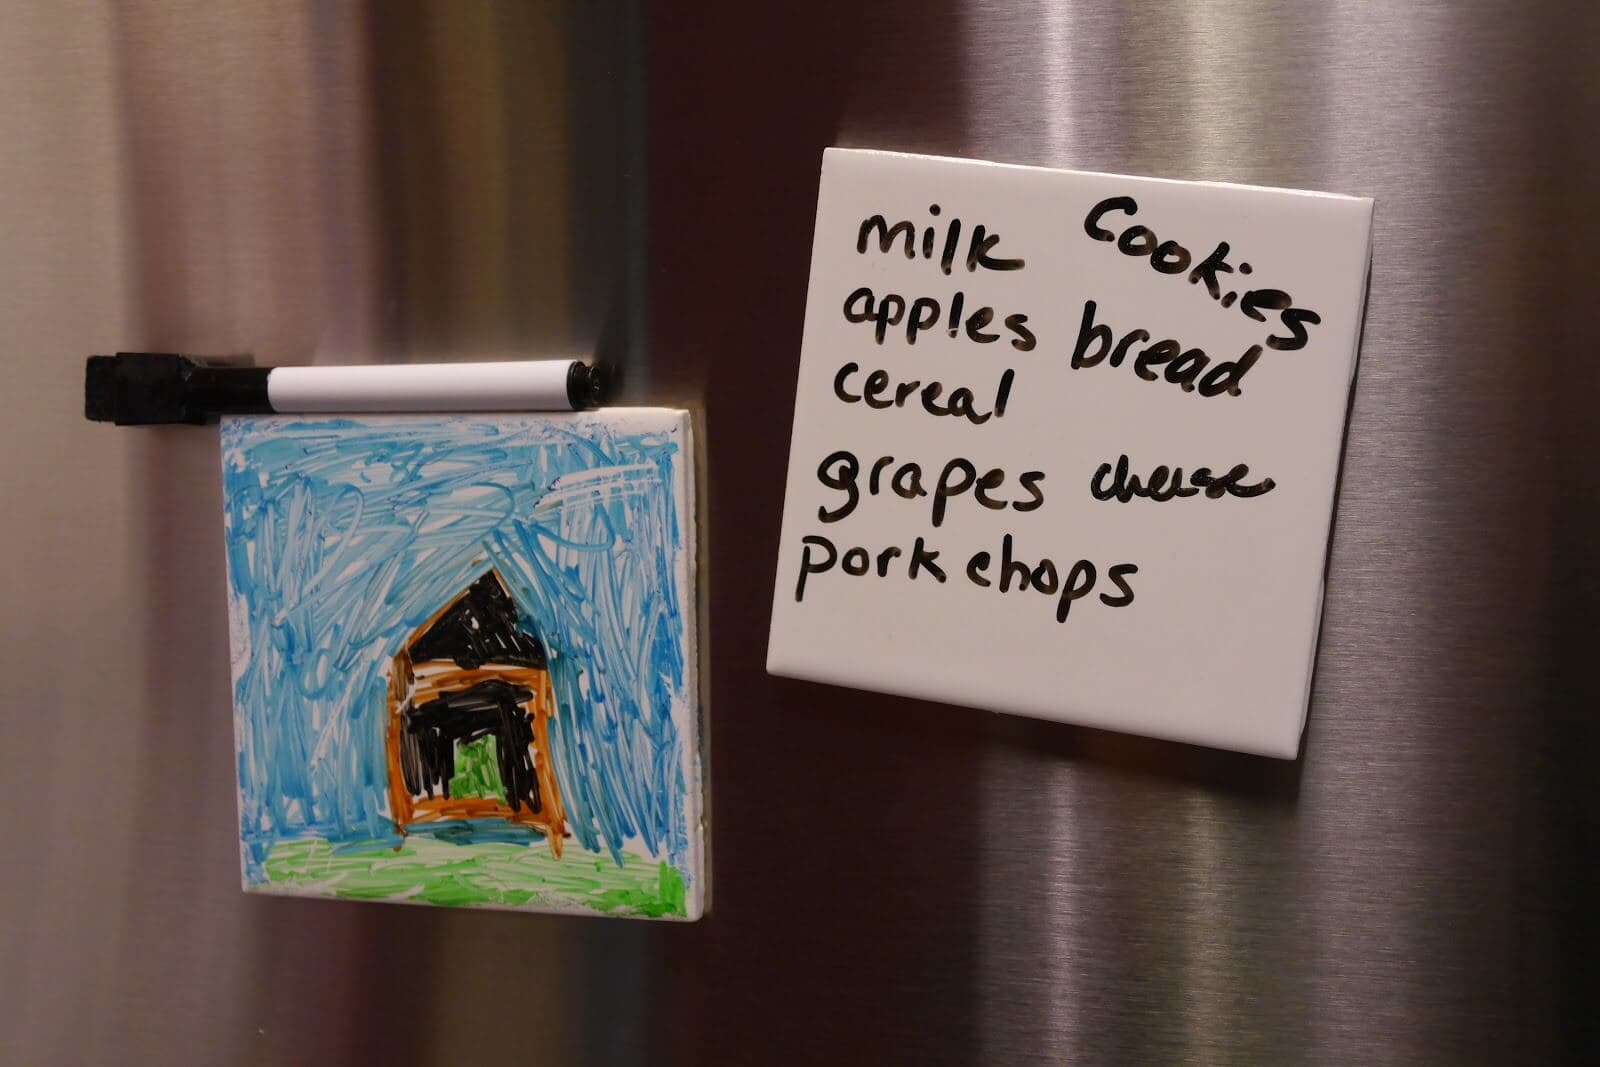
Here’s a project that’s easy and quick enough to make one for all your friends. Plain, glossy white tile is the best choice. The bigger, the better for more room to write.
Other than tile, these are the only other supplies you’ll need for dry erase magnet tiles:
- Glue
- Magnets
- Dry erase markers
Glue one magnet to each of the four corners of each tile: Voilà: a miniature dry erase board.
Remember: Don’t use a hot glue gun if you’re using neodymium magnets because the heat demagnetizes them. It’s fine to work with a low-temperature hot glue gun if you’re using ceramic magnets.
Beautifully simple! We love these for writing out grocery lists. Little hands can also use them to create ever-changing works of art for the refrigerator. And they’re so much cooler than sticky notes.
[Related: 5 Healthy Reasons To Choose Ceramic Tile for Your Next Project]
2. Tiled Serving Tray
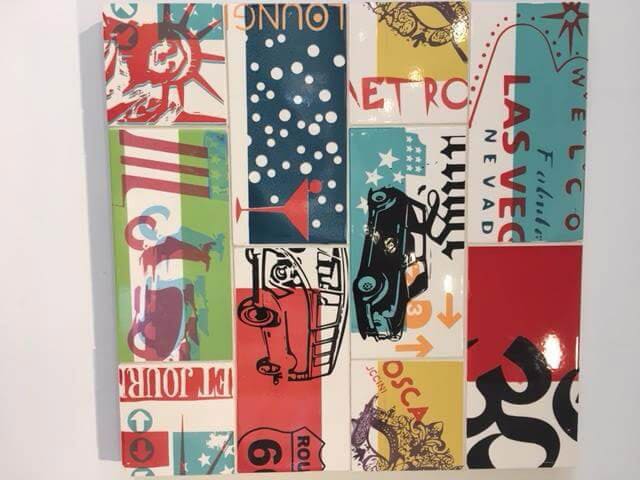
Creating a tiled serving tray is another super-easy project that requires only a handful of tiles. It’s also a perfect introduction to working with ceramic tile.
Here’s all you need:
- Wooden tray
- Tiles of your choice (we recommend something with a fun design)
- Glue
- Grout
If you don’t already have a wooden tray, swing by a local thrift store. You’re sure to find one.
Ceramic tile’s resistance to water, heat, staining, and scratches also means you can use your serving tray for all your meals. No worries about damaging your beautiful new serving piece.
[Related: Kitchen Floor Tile Ideas: Patterns & Designs Worth Standing On]
3. Tile Table Runner
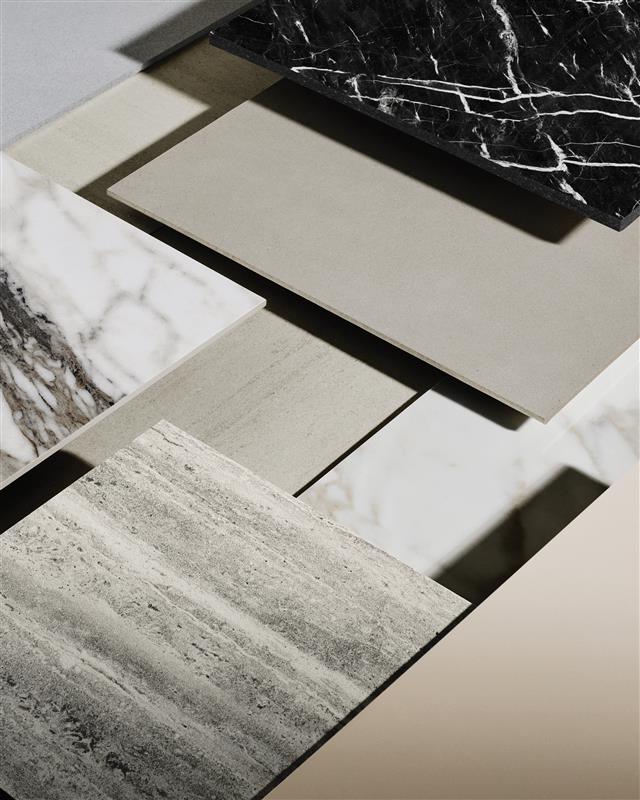
A table runner made of leftover ceramic tile isn’t just beautiful and unique. It can also serve as a hygienic table-length trivet, protecting your table from water rings and hot serving ware.
Besides tile, here’s what you’ll need:
- Spray adhesive
- Craft knife
- Craft felt in a complementary color
Arrange the tiles in your desired pattern on top of a length of the felt. One by one, turn over each tile and spray it with adhesive. Return the tile to its place and press firmly.
Continue this until you’ve glued all the tiles to the felt. After the adhesive has completely dried, turn the runner over, and trim any felt that extends beyond the tile edges.
Here’s an example of a tile table runner that uses different shapes and sizes of tiles in earthy tones.
An optional tile serving idea is to simply use your tiles as trivets for your hot serving dishes. You can also use a large tile as a cheeseboard or charcuterie board. Or arrange several tiles for a grazing table display.
Have a little spill? Ceramic tile’s easy-care nature means you can put your tiles in the dishwasher for fast cleanup.
[Related: Guide to Gauged Porcelain Tile Countertops]
4. Tile Coasters
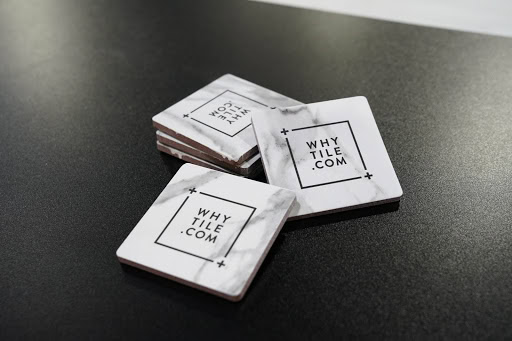
For tile coasters, use any shape and any number of tiles you have on hand. But make sure your tile is large enough for your favorite beverage. On average, 3.75 to 4.25 inches wide is a standard coaster size.
Here’s what you’ll need:
- Tile (any shape, 3.75–4.25 inches wide)
- Self-adhesive felt (sheets or pre-cut shapes) or self-adhesive cork sheets
- Scissors or craft knife
- Ribbon (optional, for gifting)
Apply felt to the back of the tile. Felt comes in self-adhesive shapes or sheets that you can cut with scissors. You can also use self-adhesive cork sheets and cut them to the size you need with a craft knife.
Your protective backing should be approximately 0.25 inches smaller on all sides than the size of your tile.
To make the coasters, apply your choice of backing to the tile and press firmly. Tie a ribbon around a set of four, and you’ve got a gift that’ll see plenty of daily use!
[Related: Your Guide to Tile for Outdoor Entertainment Spaces]
5. Wall Art Tile
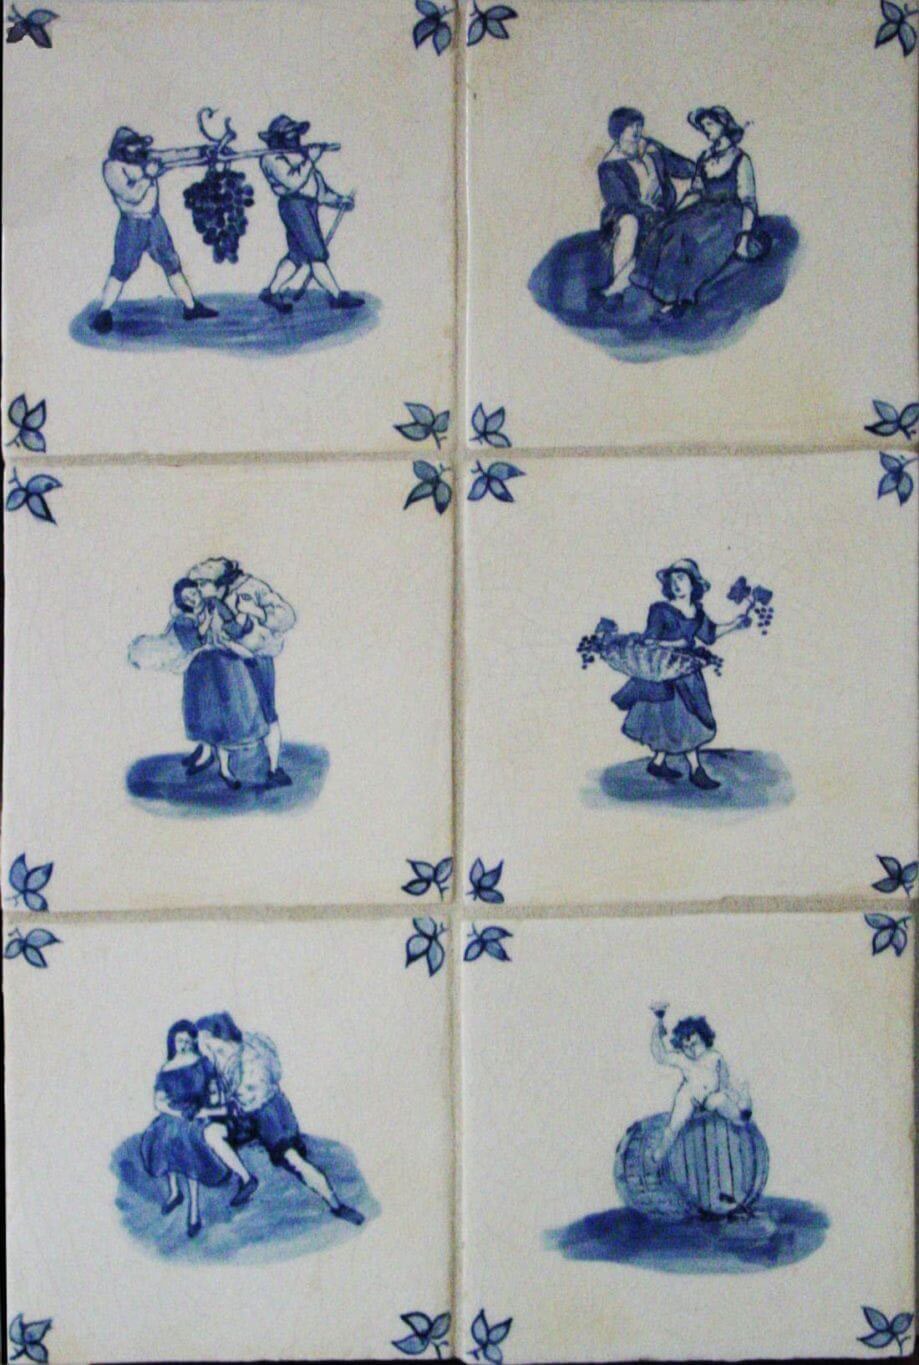
This is perhaps the easiest ceramic tile project we’re showcasing. You just need a tile, a frame, and a little inspiration.
Supplies needed:
- Tile of your choice (decorative or plain for painting)
- Frame
- Permanent markers or enamel paint (optional)
- Glass and tile medium (if using acrylic paint)
- Rubbing alcohol (for cleaning before decorating)
Many tiles are beautiful all on their own, and you can frame them as is for a decorative display. Ask at your local tile shop about open-stock inventory to find some unique tiles that you can buy individually. A more basic tile can serve as a canvas for your imagination.
For a little added flair, you can decorate the tiles with permanent markers and enamel paint. Here are a few notes before you begin decorating your tiles:
- Wipe the tile surface with alcohol to remove any grease or oil from your hands.
- Mix in a glass and tile medium first; ceramic tile resists stains, so plain acrylic paint won’t adhere well on its own. The medium helps the paint grip tile’s nonporous surface instead of beading or flaking.
Check out this project for a beautiful example of tile art created with white ceramic tile and a permanent marker.
[Related: Ceramic Tile Shopping Guide]
6. Elegant Tiled Planter Box
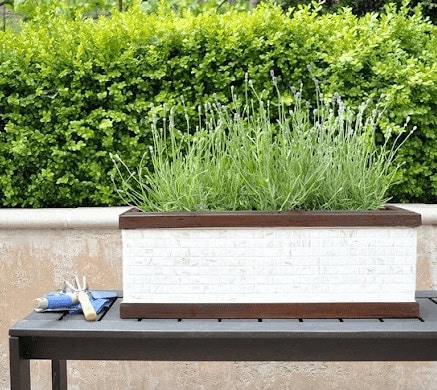
Mosaic tile, like the small square tiles that come with a mesh grid backing, can cover a boring wood box. They transform it into an elegant planter box and a fine addition to your yard.
This project is a good one for the inexperienced DIYer because you need no power tools. If you’ve never tiled a project before, this is a great way to hone your skills. Who knows? Your next project could be a DIY backsplash in your kitchen or bathroom!
Centsational Style inspired this project, and its results are sensational (pun intended). You can complete it in one day.
Here are the supplies you’ll need:
- Wooden planter box
- Thinset mortar
- Mosaic tile
- Grout
- Sponge brush for the stain
- Large sponge to rinse off the grout
- Wide plastic putty knife
- Painter’s tape
If you want contrast against your tile, stain or paint any wood trim that won’t be covered. Prime first if you’re painting. Let it dry fully. Spread thin-set mortar onto the box’s sides.
Trim the mosaic sheet to fit the dimensions (check the measurements first) and press it into the mortar. Small gaps are fine; grout fills them in later. Let the mortar cure for 24 hours.
Once cured, mix grout as directed and press it into the gaps with a float. Tape off any stained or painted trim to keep grout where it belongs. Wipe away the excess with a damp sponge, and let everything cure for another 24 hours. If you stained the trim, finish with a coat of polyurethane to protect it.
Once dry, you’ve got a planter that’s durable and dazzling.
[Related: Biophilic Design and Ceramic Tile]
7. Tiled Bookshelf
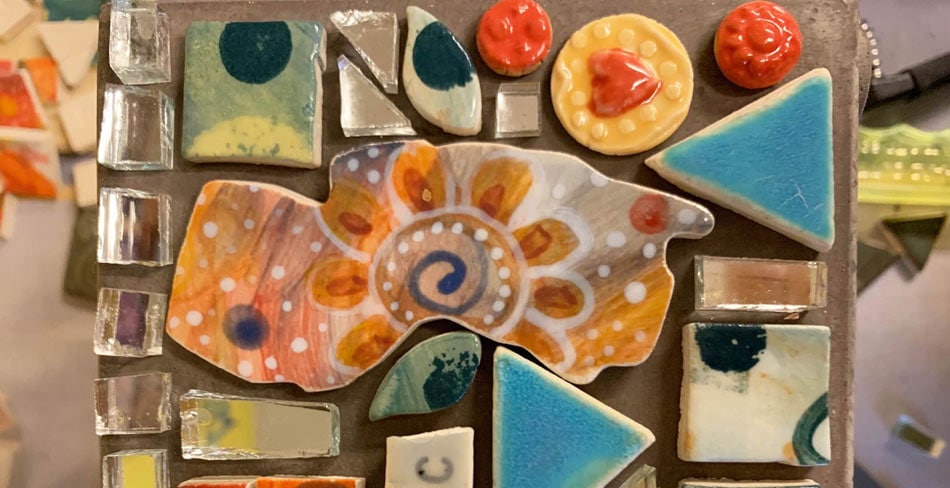
A bookshelf tiling project is suitable for all kinds of tile, but smaller tile gives it a bit more visual interest. You can revamp an otherwise dull bookshelf at the same time that you’re putting your favorite tile to use.
We recommend choosing a bookcase with removable shelves because fewer tiles will need cutting. Don’t worry if your shelves don’t come out. You can still do this project, but it’ll demand a little more time and precision.
These instructions for the bookcase (inspired by Thistlewood Farms) use mosaic tile with a mesh backing. You can easily adapt the project for use with individual tiles.
Here’s what you’ll need, other than the bookshelf and tiles:
- Tile adhesive
- Grout
- Plastic putty knife
- Trowel
Measure your bookcase’s back panel, and have your tile cut to fit. Most home improvement stores will make a few cuts for you.
Spread tile adhesive over the back panel with your putty knife, then press the tile into place and let it set overnight. Trowel grout into the gaps between tiles. Wipe away the excess with a damp sponge, and go back over it again to clear any leftover haze.
If you’re also painting your bookcase, paint before you tile; it’ll be easier than painting around the tile. Primarily avoid painting the areas being tiled. If your bookcase is already painted, check the adhesive to make sure it works over paint.
[Related: Using Ceramic Tile in Your Home Office]
8. Rejuvenated Tile Tabletop
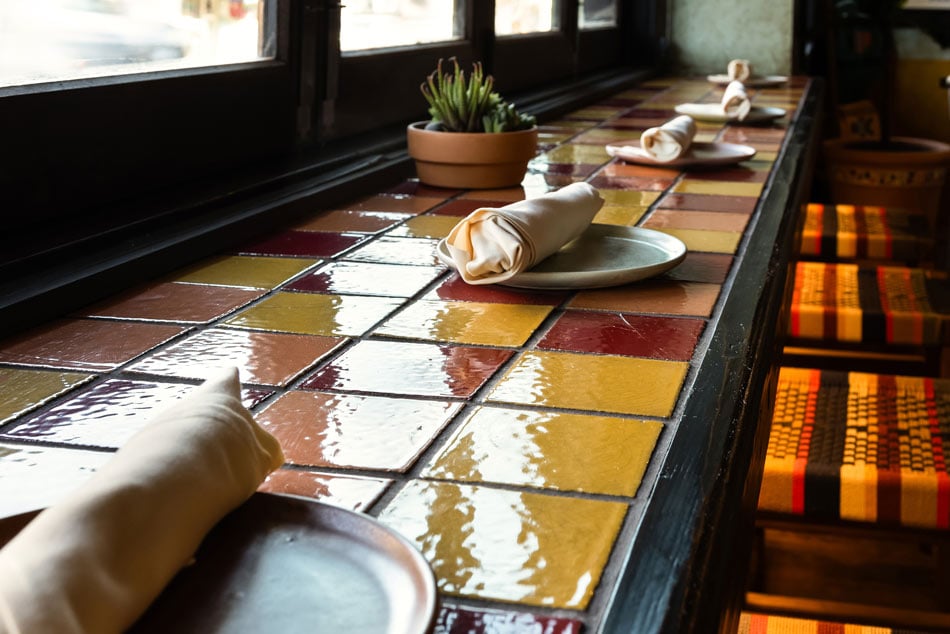
Tiling the top of an old table with leftover tile is another good project that kills two birds with one stone. You get to use up and upcycle leftover tile, and you get a new table out of the deal. It’s a win–win!
Here’s a list of supplies you’ll need, other than the table and tiles:
- Tile adhesive
- Notched trowel
- Rubber float
- Grout
- Grout sponge
- Tile cutters
- Bucket
- Water
- Plastic gloves
- Goggles
These instructions (courtesy of PrettyHandyGirl) detail how to tile a small table top but work for tables of all sizes.
Dry-fit your tile on the tabletop first to plan your layout, cutting pieces as needed to fill any gaps (wear goggles).
Mix your tile adhesive to a thick, peanut-butter-like consistency. Spread it with the notched trowel, and press the tile into place. Finish the edge with a row of tile if your top doesn’t line up perfectly on its own. Let it sit for 16 to 24 hours before grouting.
Let the adhesive cure. Then, mix the grout and spread it over the tile with a rubber float, pushing it into the gaps between pieces. Wipe away the excess with a damp sponge right away, then wipe again after it’s dried.
If the table is a dining table, a coffee table, or one you’ll put food and drinks on, use a grout sealer or self-sealing grout.
[Related: Heartfelt Valentine’s Day Crafts We Love]
9. Ceramic Tile House Numbers
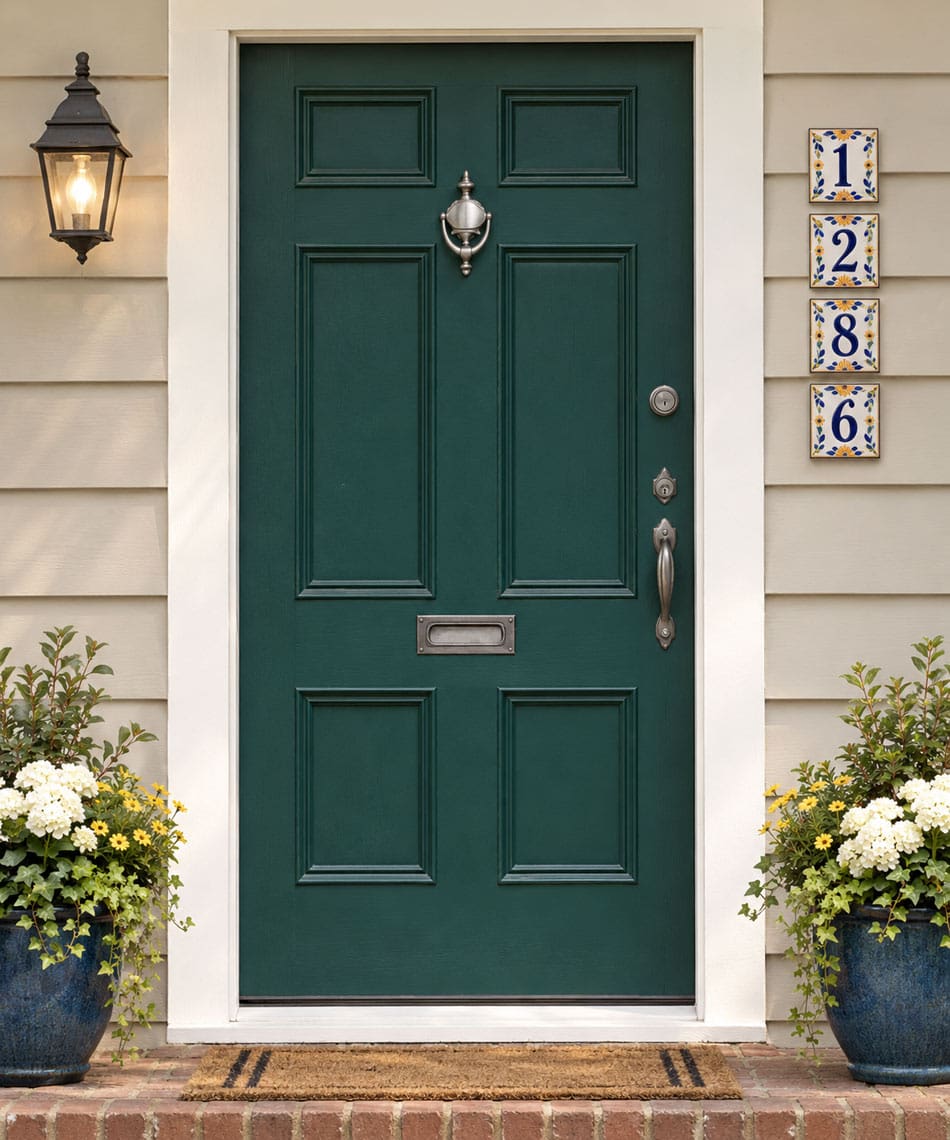
What better way to make your home’s front entrance stand out than creating unique ceramic tile house numbers? This project is incredibly simple and only requires a few white tiles of the same size (we recommend 4-inch tiles).
Here’s what you’ll need besides ceramic tiles:
- Printer (for your template)
- Fine-tip permanent marker or paint pen
- Clear, UV-resistant topcoat
- Mounting bracket (optional)
Design your numbers first. Choose a style that best suits your home’s facade (or choose a different style for each season).
Canva’s free number templates make it easy to pick a font and size, then print your design at home. Cut out your numbers, and trace them onto the tile with a fine-tip permanent marker or paint pen. You can also use the printed cutouts as stencils.
Let the design try. Then, seal it with a couple coats of clear, UV-resistant topcoat to protect it from sun and weather exposure. You may even want to take your craft a step further and put the tiles in a bracket to secure them in place.
[Related: 5 Ways To Make Your Home Remodel Pay Off]
10. Tiled Cabinet Door
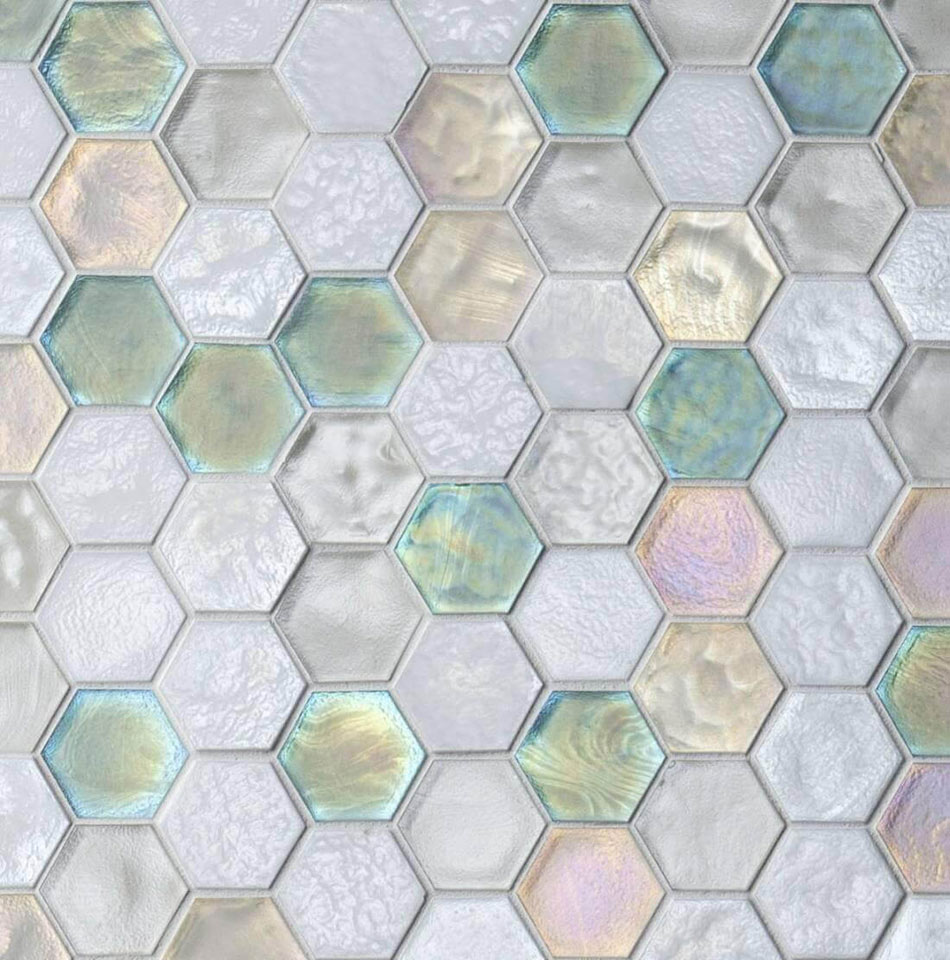
No lie: This is our favorite out of all 10 projects for leftover tile. And it’s one of the simplest, too, if you skip traditional mortar for a peel-and-stick mesh backing.
Here’s all you need:
- Mosaic tile sheet(s) on mesh backing (about 1.5 sheets)
- Self-adhesive mesh backing roll
- Cutting tool (scissors or utility knife for trimming)
Apply the self-adhesive mesh to the cabinet door, then press the ceramic mosaic sheet onto it. Trim to fit as needed. This skips the mess of mixing and applying mortar. Because you usually install mosaic sheets without visible grout lines between the small tiles, you get a clean look with minimal fuss.
Consider tiling just a couple of cabinets for a feature that’ll stand out from the rest of your cabinetry. We love how this project coordinated the mosaic tile’s color with the cabinet’s color. Wouldn’t this be a lovely way to dress up a medicine cabinet in the bathroom?
[Related: Using Inexpensive Materials To Create a Rich Look]
Bonus: 3 More Ways To Upcycle Leftover Tile
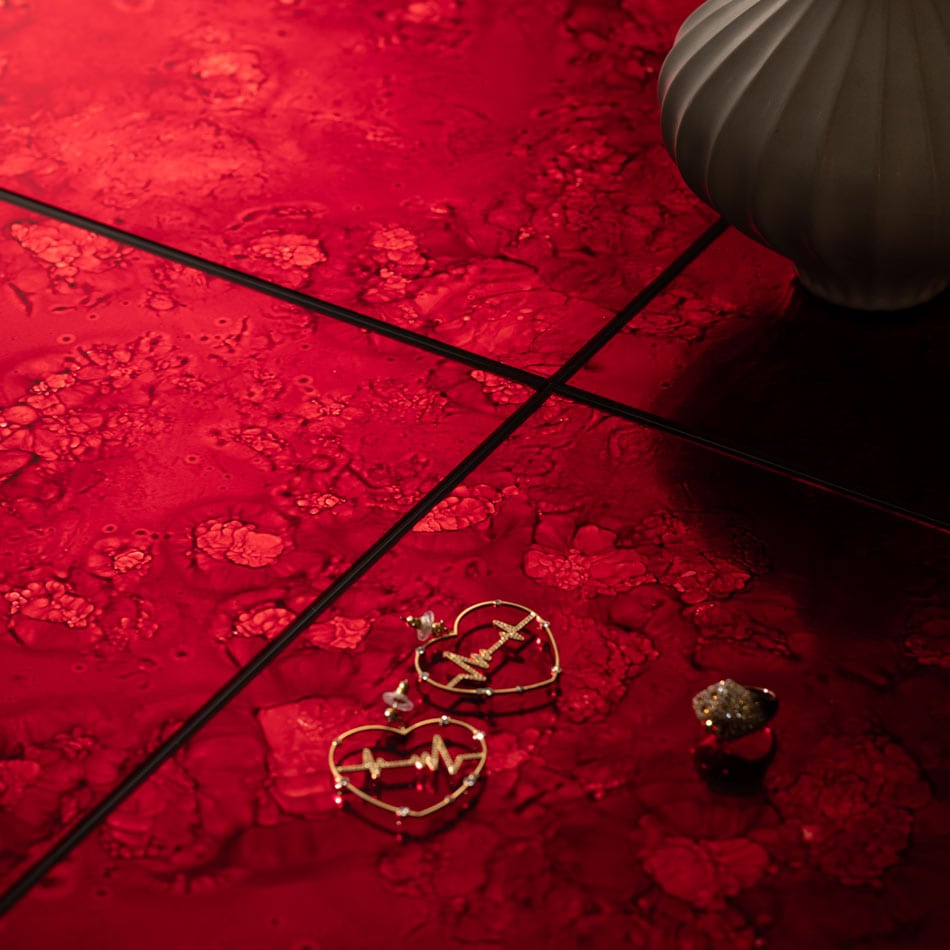
Because ceramic tile goes practically anywhere, it’s a wonder we don’t end up tiling everything. Here are a few more places to use your leftover tile in fabulous ways.
Tile Garden Stepping Stones and Plant Markers
Got tile left over from an outdoor project? Turn it into a colorfast, weatherproof stepping stone for your garden. You can also go smaller with charming plant markers for herbs and veggies.
Here’s your supply list:
- Leftover tile (whole or broken pieces)
- Stepping-stone mold (or a simple frame form)
- Quick-set concrete
- Outdoor-rated paint marker or enamel paint (for plant markers)
For stepping stones, pour quick-set concrete into your mold, then press tile pieces into the wet surface, mosaic-style. Let it cure per the concrete’s instructions.
For plant markers, skip the concrete entirely. Paint a single tile with an outdoor-rated marker and push it into the soil next to the plant it names. Know your parsley, sage, rosemary, and thyme, and keep it circular while you’re at it!
Tile-Wrapped Vase
A regular old glass or ceramic vase gets a makeover with a few pieces of leftover tile. This is a great project for using up small or mismatched tile scraps.
Gather these things:
- Vase (glass or ceramic)
- Leftover tile, broken or cut into fragments
- Tile adhesive
- Grout
- Grout sponge
Arrange the tile fragments around the vase in your pattern of choice. Adhere them one at a time with tile adhesive. Once set, grout the gaps the same way you would any mosaic project. Wipe away the excess with a damp sponge, and let it totally cure.
You can make use of even slivers of tile, mixing or matching textures, colors, patterns, shapes, and sizes. Kit-kat (linear) tile pieces are fantastic for adorning curved surfaces.
Tile Scrap Pendants and Keychains
Oh yes, fashion enters the mix! Don’t toss the tiny, oddly shaped pieces other projects leave behind. A single fragment with an interesting texture or stunning shade is enough to make a wearable, giftable keepsake.
Here’s your supply list:
- Small tile fragment or scrap
- Fine-grit sandpaper
- Strong adhesive (E6000 or similar)
- Jewelry bail or keyring hardware
Sand any sharp edges on the tile scrap until smooth. Attach a jewelry bail with adhesive for a pendant or a keyring loop for a keychain. Let it cure fully. Wear it with pride.
It’s tile upcycling in its purest form: Nothing goes to waste, right down to the teensiest chip.
[Related: Guide to Going Green With Ceramic Tile]
Where To Find Leftover Tile
Don’t have any tile on hand but raring to try one of these projects? Fortunately, general tile for crafts is usually easy to find, and sourcing it is its own form of upcycling.
Try these spots:
- Tile salvage yards. Many states have salvage yards dedicated to building material remnants. You can dig through bits of reclaimed, discontinued, and surplus tile for a fraction of the retail price. It’s also fun for eco-conscious decorators and DIYers, who can dig in and hunt for one-of-a-kind styles.
- Overstock and discontinued lines from manufacturers. Tile showrooms and manufacturers regularly clear out overstock, remnants, and discontinued looks at a mighty discount. It’s a dream for small craft projects that don’t demand matching sets.
- Home improvement clearance sections. Big-box retailers often have an odds-and-ends bin of open-box or leftover tile from returns and canceled orders. If you ask, some stores will point you toward broken-case or end-of-lot inventory.
- Past projects. Check your garage, basement, or storage. You may already have an assortment of tile saved from years-old renovations.
- Online and secondhand sites. Etsy, eBay, Facebook Marketplace, Habitat ReStore: You’d be amazed at the tile gems you can find.
However you get it, buying and using reclaimed or surplus tile keeps perfectly good material out of landfills. A sustainable choice and a beautiful one aren’t mutually exclusive.
[Related: 2025 Tile Trends: Carbon Conscious]
Take Leftover Tile To New Spaces
We could go on and on with fun, beautiful craft and upcycling projects like these. Check the Why Tile blog for posts on tile projects that break the cookie-cutter mold.
We hope this collection inspired a project or two for your leftover tile (or at least a quick trip to the tile shop for more). With ceramic tile’s beauty, durability, sustainability, and endless versatility, the possibilities really are limitless.
Ready to see what else tile can do? Browse our design gallery and DIY Pinterest board for inspiration here in every space.